
Introduction
Welcome to the documentation of Axial Finance.
This guide serves as a resource to users needing direction in Axial Finance interface.
How to start
You may start with the dashboard page and the toolbar description. Then see how companies work and check users page for permissions. Confused about the difference between invoices and revenues? Check it out. Here you can learn what is a payment and a bill.
Dashboard
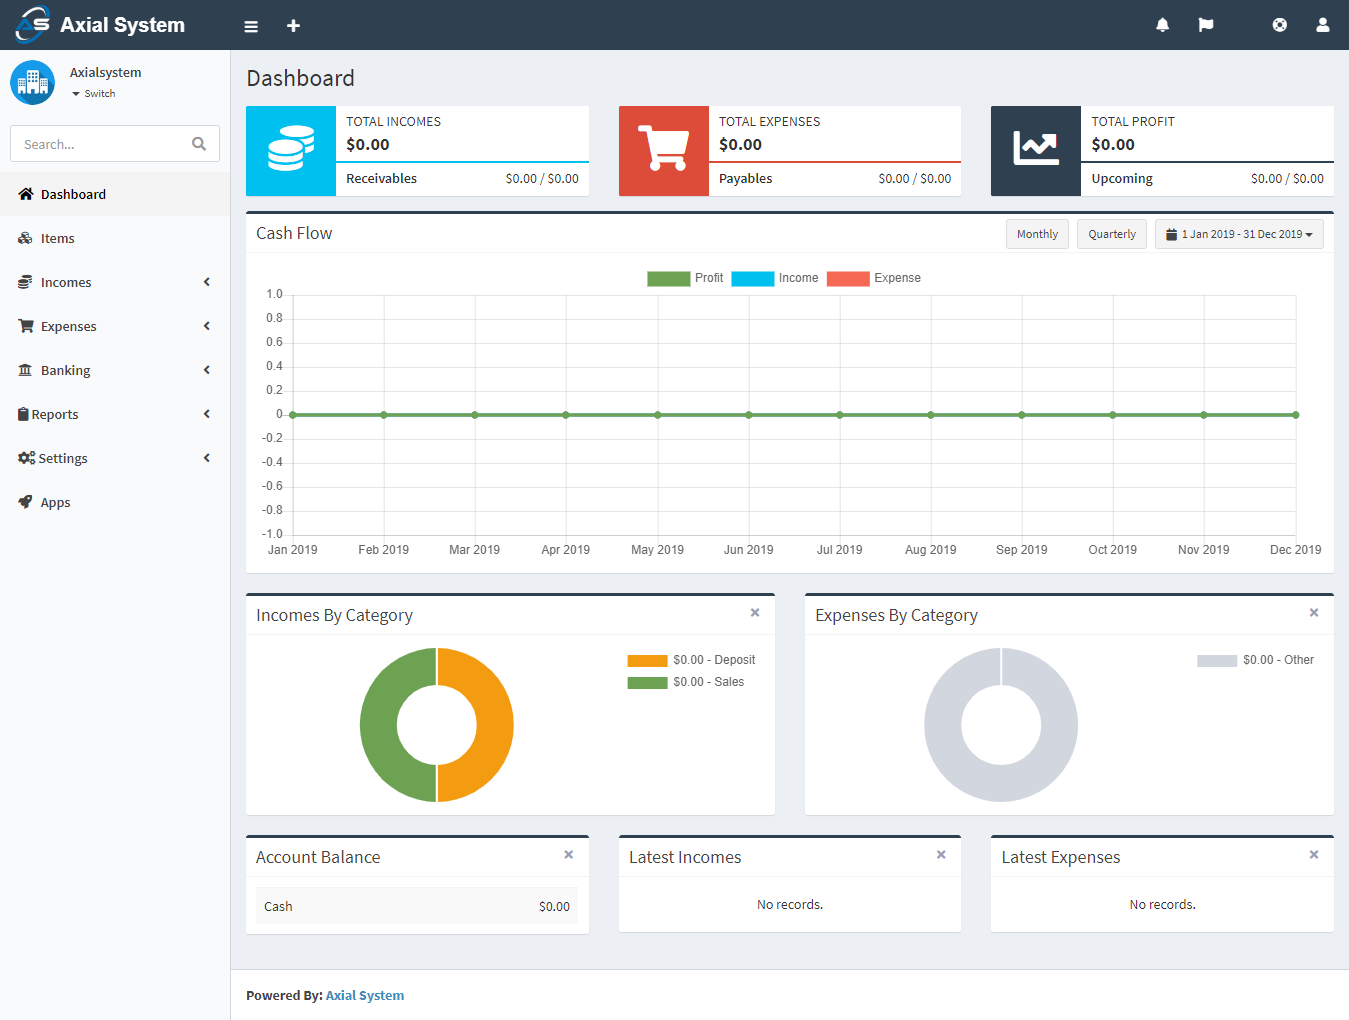
The dashboard is the first thing you will see when entering Akaunting. The main function of the dashboard is to give the owner an overview of how the business is performing. Dashboard reports show the accrued incomes and expenses, except Cash Flow chart.
Totals and charts are displayed under the default currency. Invoices, revenues, bills, and payments created under a different currency will be converted based on the currency rate at the time they were created.
- Totals: Sum up the income, expense and profit state of your business. They also show the upcoming (not paid) invoices/bills.
- Cash Flow: Shows the income, expense and profit in cash per day and/or month.
- Incomes By Category: A pie chart to show the distribution of incomes. Invoices are a shown as a category of itself.
- Expenses By Category: A pie chart to show the distribution of expenses. Bills are a shown as a category of itself.
- Account Balance: It shows the balance of each account you’ve added.
- Latest Incomes: A list that displays the last 5 incomes.
- Latest Expenses: A list that displays the last 5 expenses.
Menu
In the left side of there is a navigation menu. You can navigate between the Items, Incomes, Expenses, Banking, Reports, Settings and Apps. These sections will be explained in further detail in the following sections of the User Manual.
Toolbar
The toolbar is used to gives quick access to the most used or common parts.
Quick Add
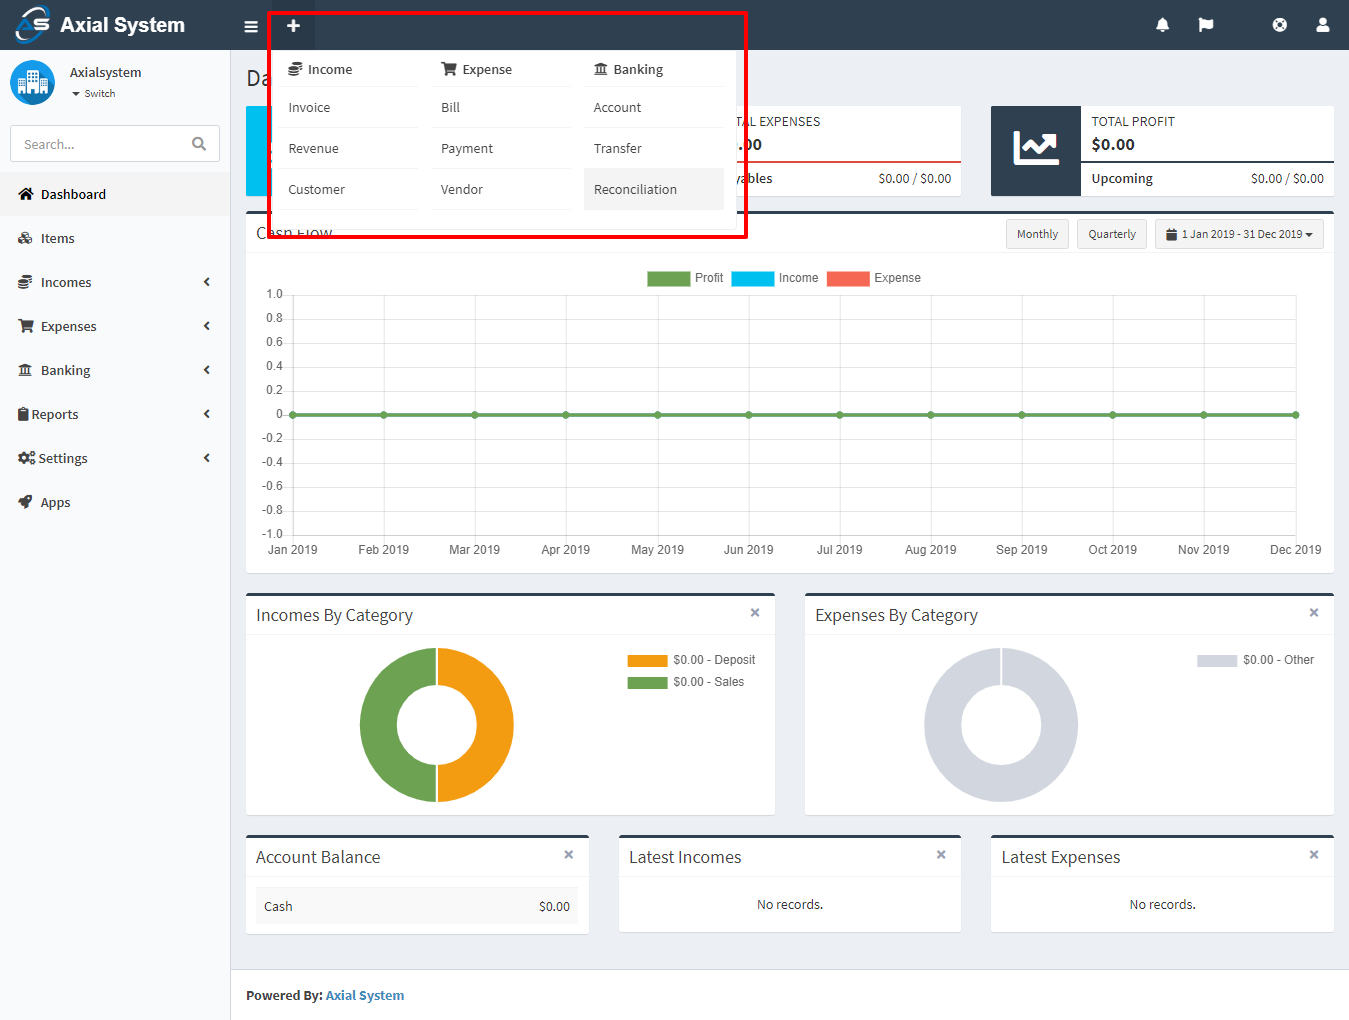
The plus button at the left side of toolbar speeds up the progress of adding new Income, Expense and Banking records.
Notifications
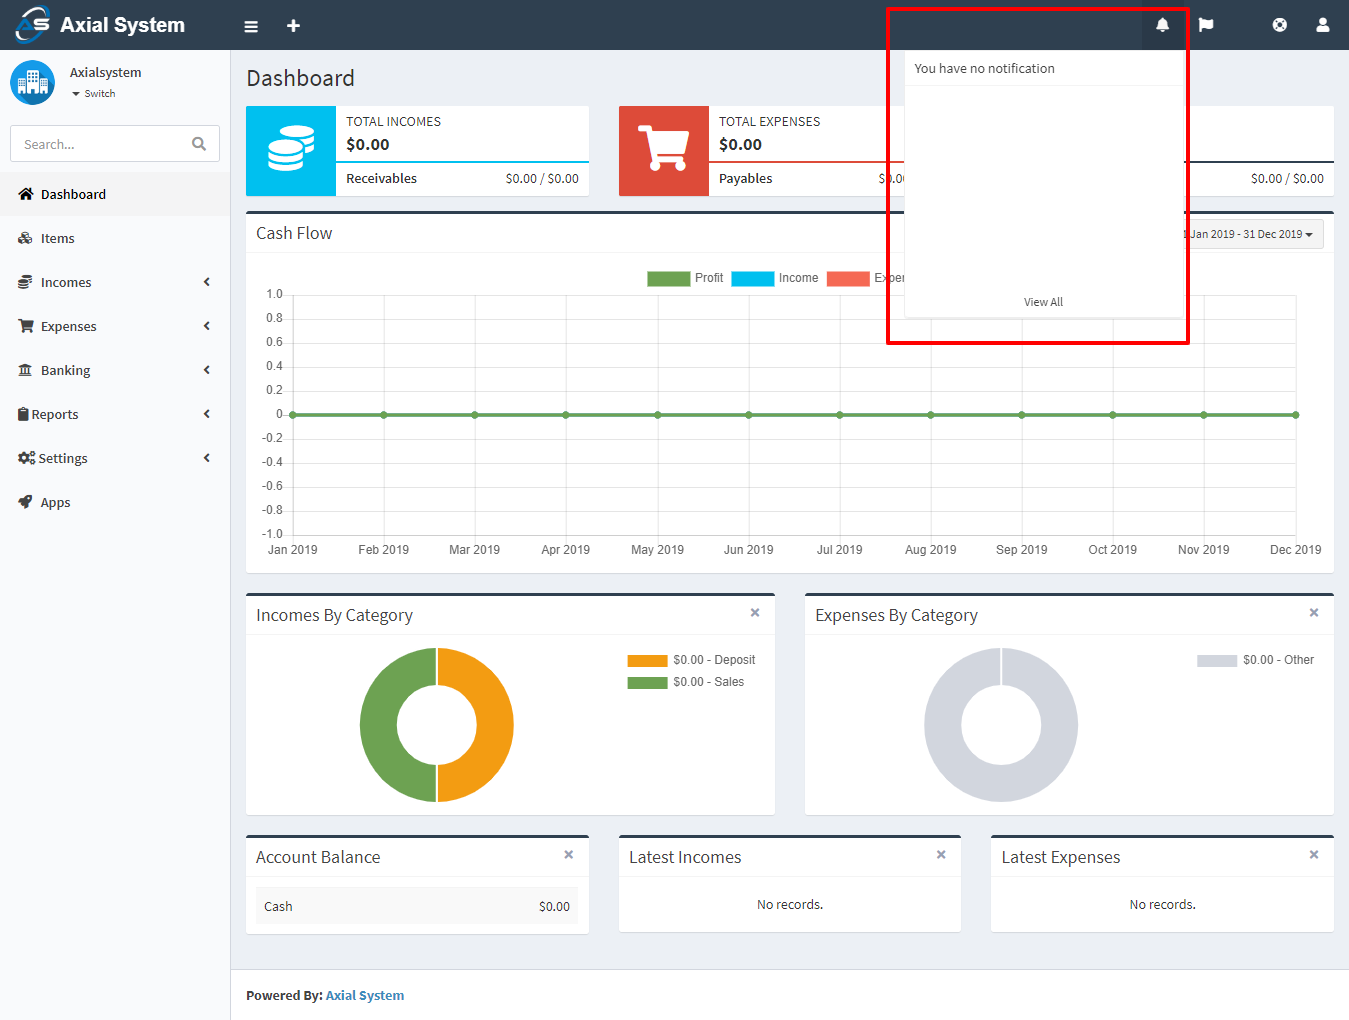
The bell button at the right side of toolbar will show any available notification, per user/customer. It will notify if there is any item out of stock or there is an invoice/bill overdue.
Languages
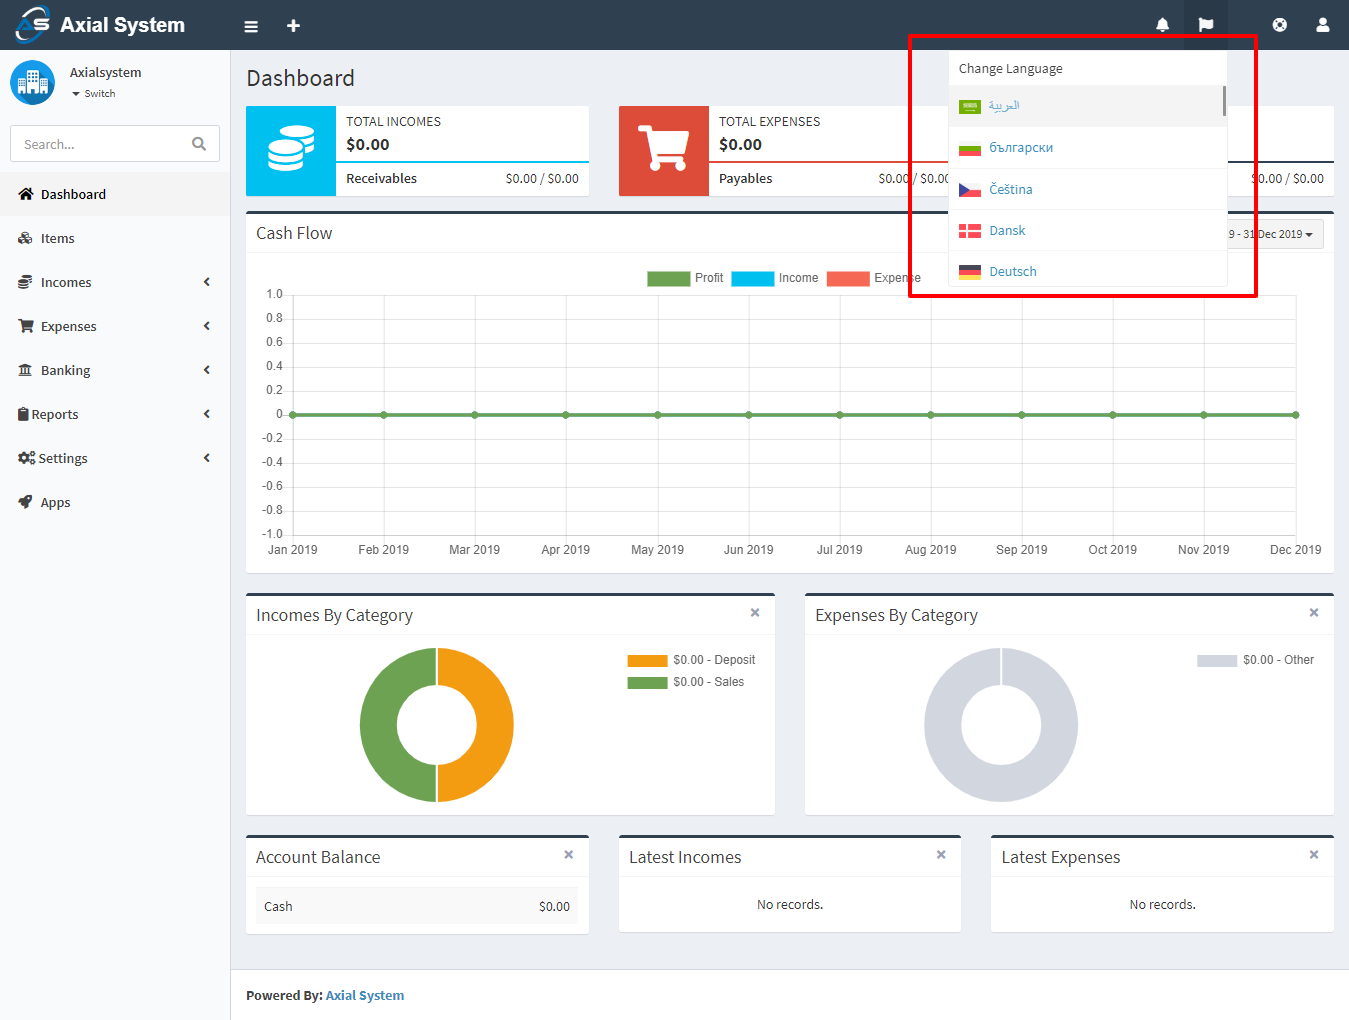
The flag button at the right side of toolbar shows the languages .
Help
The life ring button at the right side of toolbar will redirect you to this documentation.
Items
Item
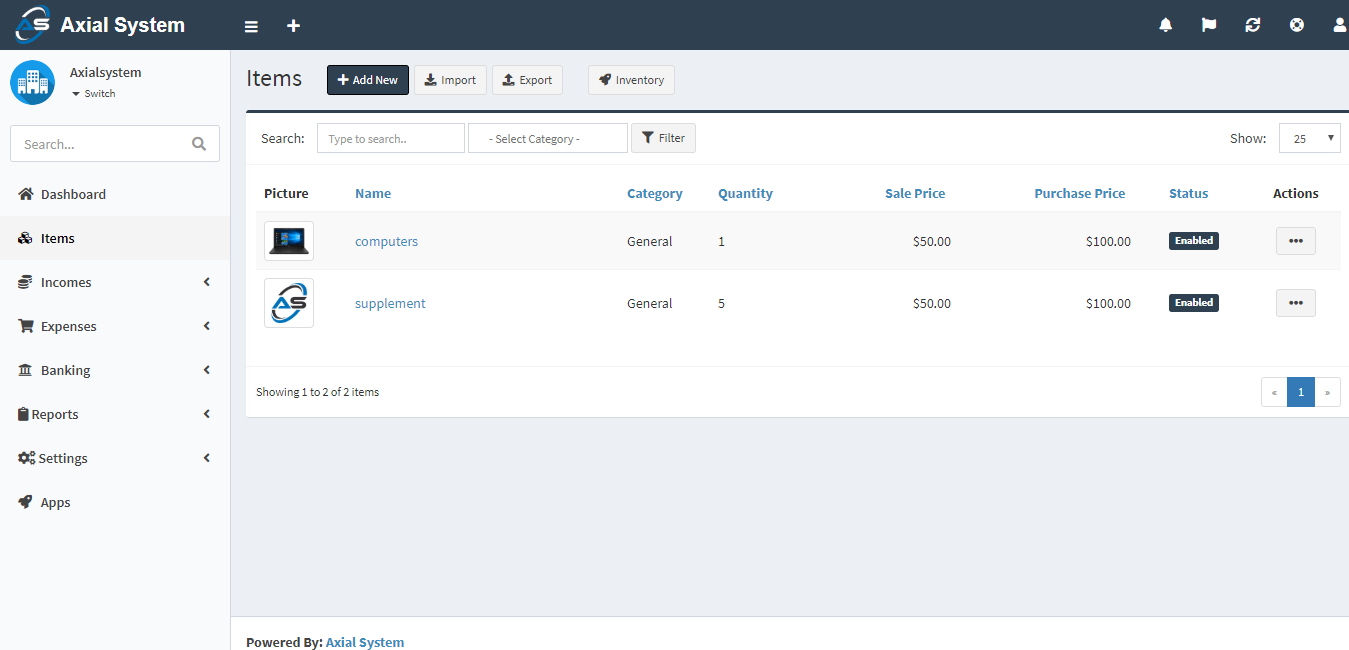
On this page you can see all items, search for any, create a new one, edit the current ones and delete them. Items can be products or services. You can use items when creating invoices and bills to have the price, tax etc fields populated.
The following fields are displayed:
- Picture: Item’s picture.
- Name: Item’s name.
- Category: Category of item, if applicable.
- Quantity: How many items are available. This is useful for stock management. Quantity gets decreased whenever an invoice is created and increased when a bill is created.
- Sale Price: This price will be populated in invoices.
- Purchase Price: This price will be populated in bills.
- Status: Disabled items don’t get populated when creating invoices/bills.
- Actions: You can use this button to edit, duplicate, and delete the item.
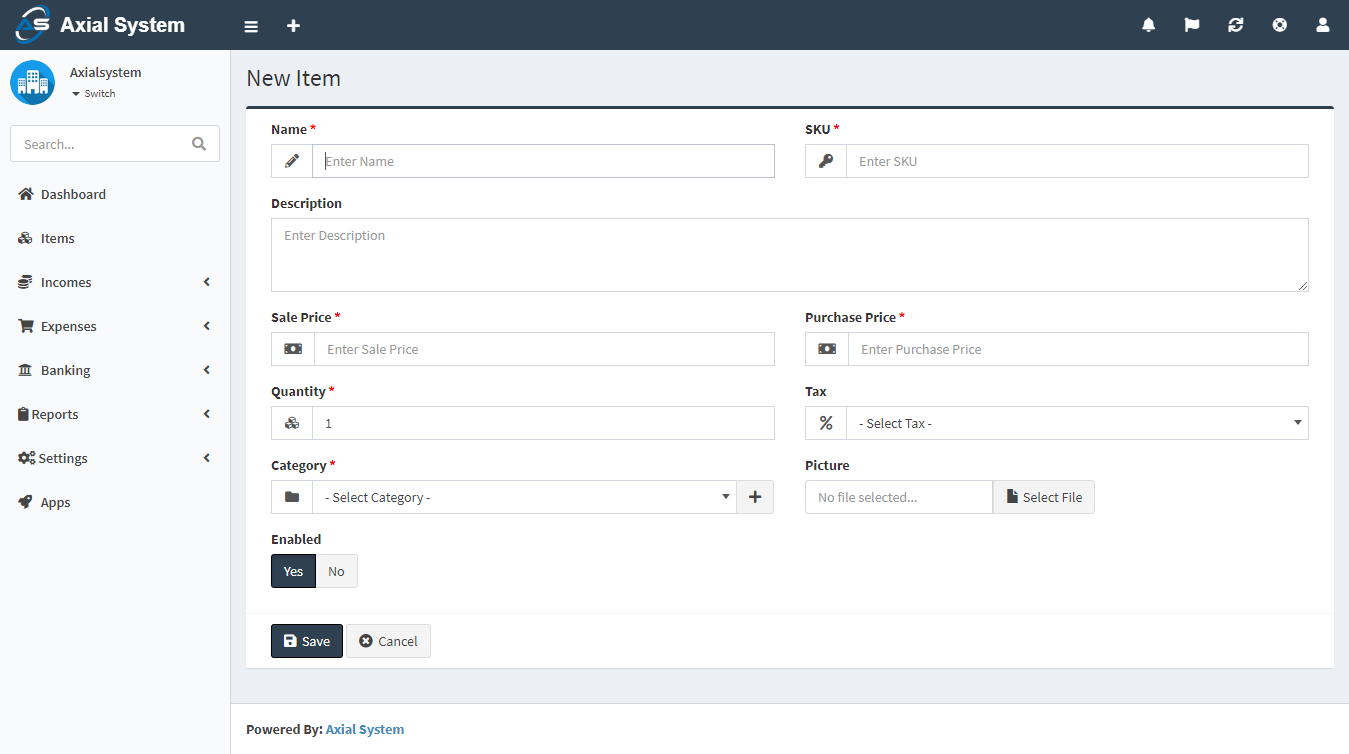
New Item
The following details are displayed as blank to be filled, some are required and some not. Those marked with red star are required.
- Name: Item’s name.
- SKU: Item’s sku. SKU is a unique field.
- Description: Item’s description, if applicable.
- Sale Price: This price will be populated in invoices.
- Purchase Price: This price will be populated in bills.
- Quantity: How many items are available. This is usefull for stock management. Quantity gets descreased whenever an invoice is created and increased when a bill is created.
- Tax: Tax of item, if applicable. It will be populated when creating invoices/bills.
- Category: Category of item, if applicable.
- Picture: Item’s picture.
- Status: Disabled items don’t get populated when creating invoices/bills.
Income
Revenues
Revenues
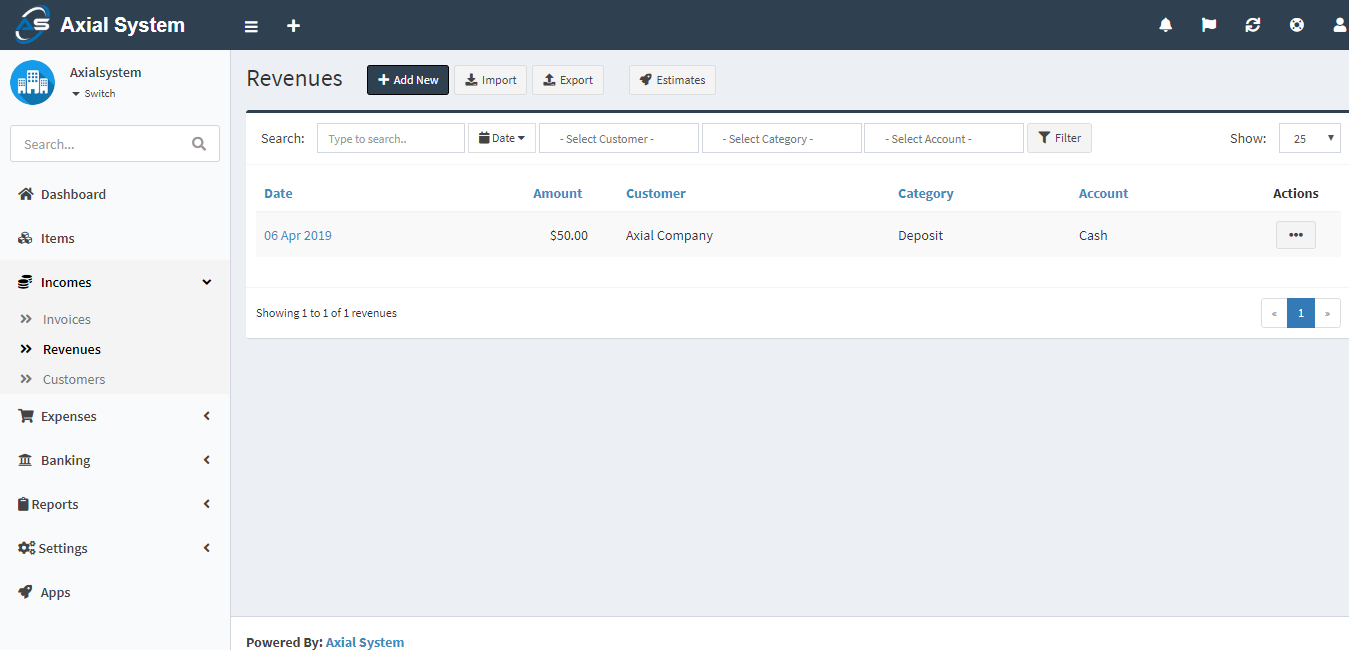
Revenue is a non-invoiceable and paid income. You can also record the money deposits from the revenues page. Check out this page for the difference between invoices and revenues.
Revenues page is located under Incomes > Revenues menu. On this page you can see all revenues, search/filter for any, create a new one, edit the current ones and delete them.
The following fields are displayed:
Date: Paid date.
Amount: Amount of the revenue.
Customer: Who paid the revenue.
Category: Category of the revenue.
Account: Account paid to.
Actions: You can use this button to edit, duplicate, and delete the revenue.
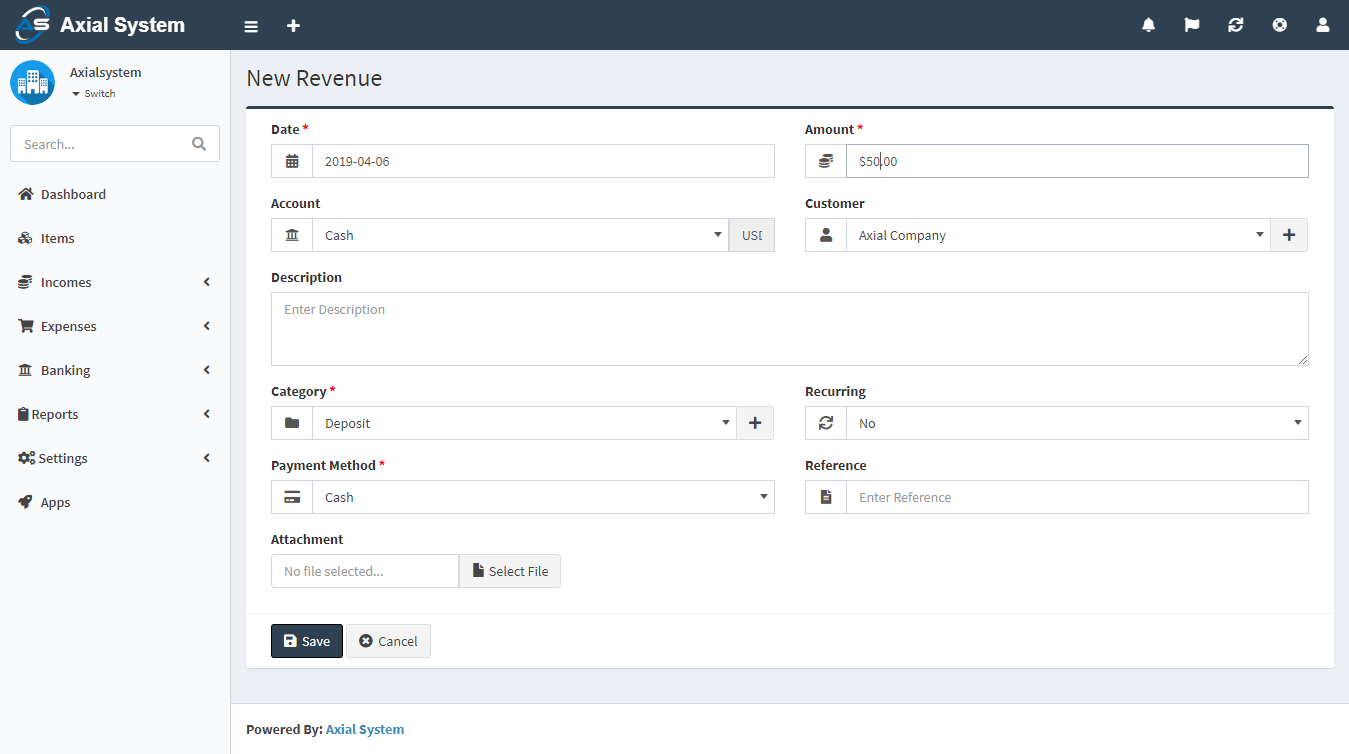
New Revenue
The following fields are displayed as blank to be filled, some are required and some not. Those marked with red star are required.
Date: Paid date.
Amount: Amount of the revenue.
Account: Account paid to.
Description: Custom description for the revenue.
Category: Category of the revenue to be used in reports.
Recurring: Automatically create revenues for ongoing jobs. Times=0 means infinite. Don’t forget to set the Cron Command available at Settings > General > Scheduling.
Customer: Who paid the revenue.
Payment Method: Method used to pay the revenue.
Reference: Any possible reference.
Attachment: You can attach file related to the revenue.
Invoices
Invoices
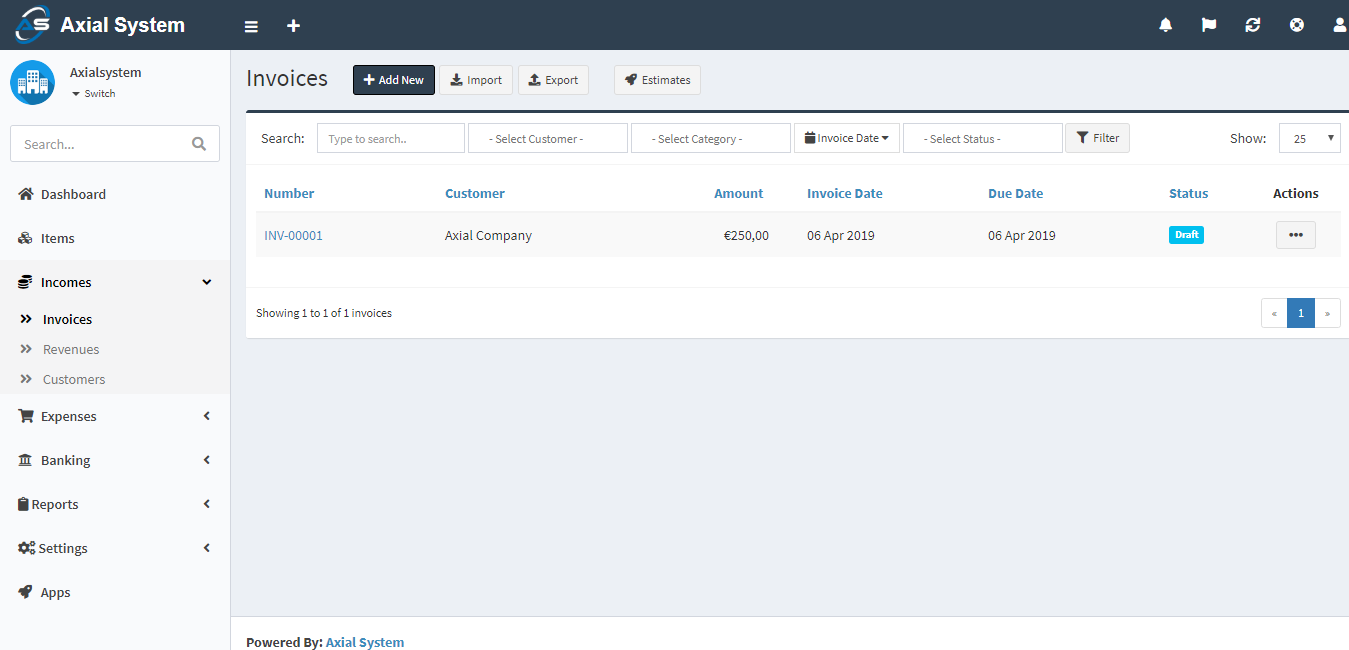
Invoices page is located under Incomes > Invoices menu. On this page you can see all invoices, search/filter for any, create a new one, edit the current ones and delete them.
The following fields are displayed:
Number: The number assigned to the invoice.
Customer: Who will pay the invoice.
Amount: Amount of the invoice.
Invoice Date: Date when the invoice is issued.
Due Date: Date when the invoice is due to be paid.
Status: The status of the invoice.
Actions: You can use this button to show, edit, duplicate, and delete the invoice.
New Invoice
The following fields are displayed as blank to be filled, some are required and some not. Those marked with red star are required.
Customer: Who will pay the invoice.
Currency: Currency used.
Invoice Date: Date when the invoice is issued.
Due Date: Date when the invoice is due to be paid.
Invoice Number: The number assigned to the invoice.
Order Number: A number assigned to an order for that invoice.
Items: The list of all items that can be assigned to that invoice. You can add multiple items.
Actions: There are 2 (two) actions; Add and Delete.
Name: The name of item. It will populate records from Items page after you start typing their name. It can also be a custom item.
Quantity: Default is 1. You can enter decimal quantity (1.7)
Price: The sale price of item. It will bring it automatically but you have the opportunity to change it if you want.
Tax: The list of applicable Tax Rates. You can select multiple taxes. See the Settings > Tax Rates documentation for more details.
Total: It will calculate automatically the total price of item according the quantity and tax. It is not an editable field.
Subtotal: The total prices of items without taxes.
Tax: The total price of taxes.
Total: The final amount of invoice, including everything.
Notes: You can add a custom note to the invoice.
Category: Category of the invoice to be used in reports.
Recurring: Automatically create invoices for ongoing jobs. Times=0 means infinite. Don’t forget to set the Cron Command available at Settings > General > Scheduling.
Attachment: You can attach file related to the invoice.

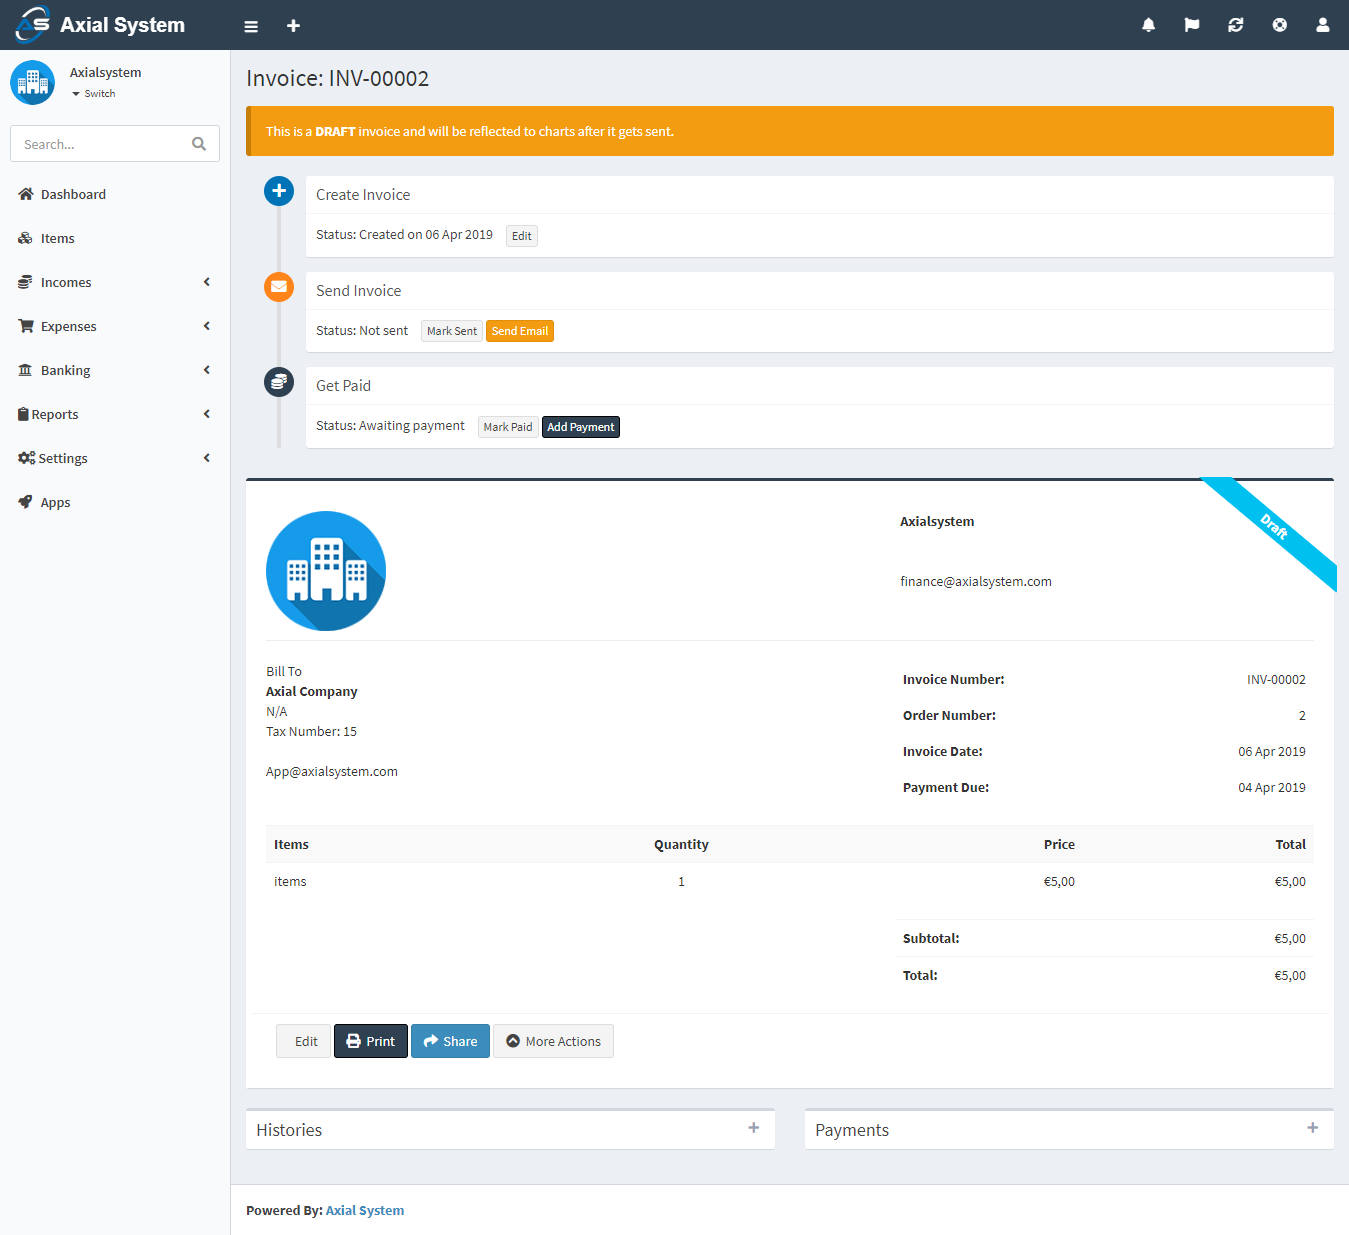
Show Invoice
The following image shows the details page of an invoice:
Customers
Customers
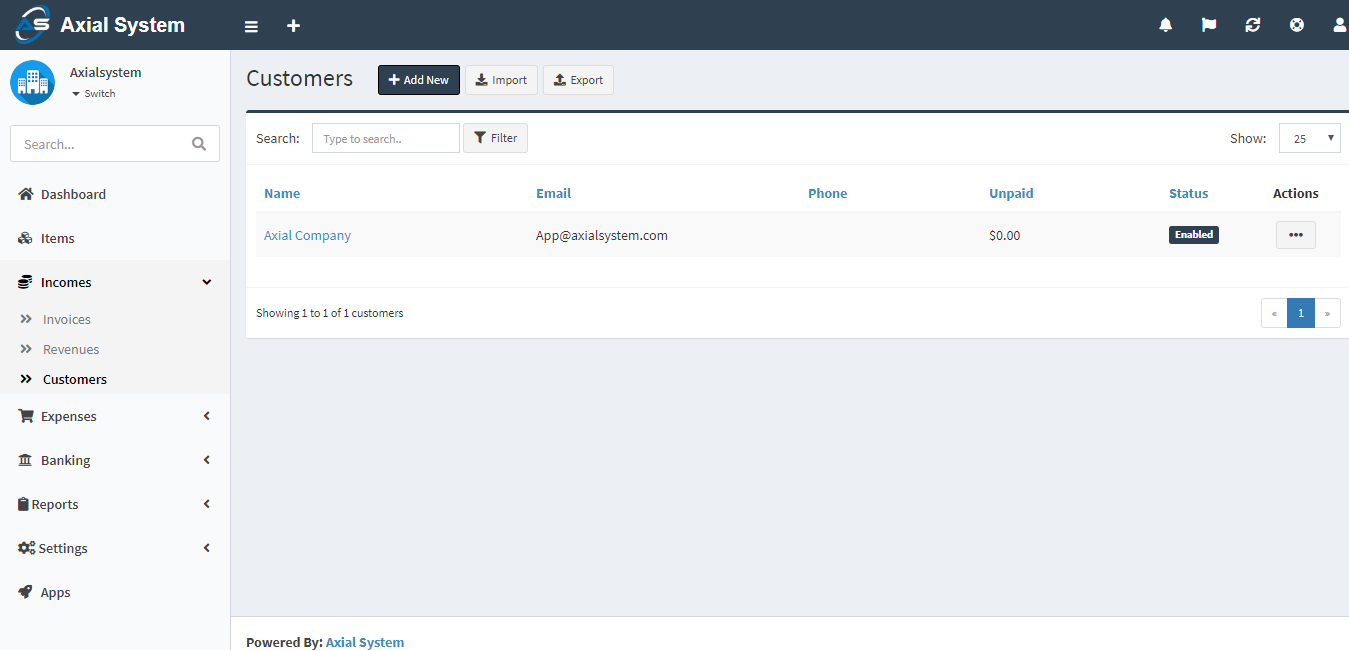
Customers page is located under Incomes > Customers menu. On this page you can see all customers, search for any, create a new one, edit the current ones and delete them.
The following fields are displayed:
Name: Customer’s full name.
Email: Customer’s email address.
Phone: Customer’s phone number.
Unpaid: The amount that customer has not paid yet.
Status: Status of the customer.
Actions: You can use this button to edit, duplicate, and delete the customer
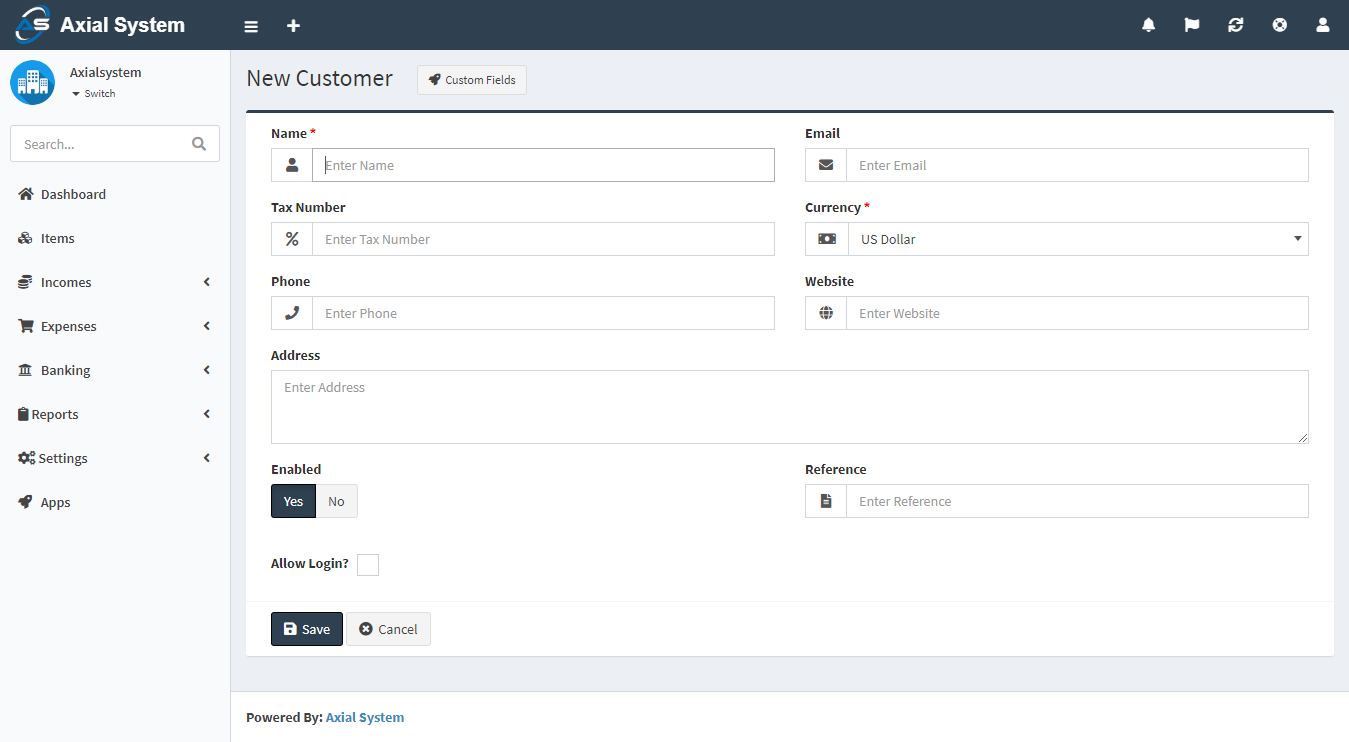
New Customer
The following fields are displayed as blank to be filled, some are required and some not. Those marked with red star are required.
Name: Customer’s full name.
Email: Customer’s email address.
Phone: Customer’s phone number.
Website: Customer’s website.
Address: Customer’s address.
Currency: Default currency to be used for the customer.
Enabled: Status of the customer.
Reference: Any possible reference.
Allow Login: Selecting this option will ask you for password. You customer may access the Client Portal using their email and password and so on see/pay the invoices assigned to them.
Expenses
Bills
Bills page is located under Expenses > Bills. On this page you can see all bills, search/filter for any, create a new one, edit the current ones and delete them.
The following fields are displayed:
Number: The number assigned to the bill, by your vendor.
Vendor: To whom will pay the bill.
Amount: Amount of the bill.
Bill Date: Date when the bill is issued.
Due Date: Date when the bill is due to be paid.
Status: The status of the bill.
Actions: You can use this button to show, edit, duplicate, and delete the bill.
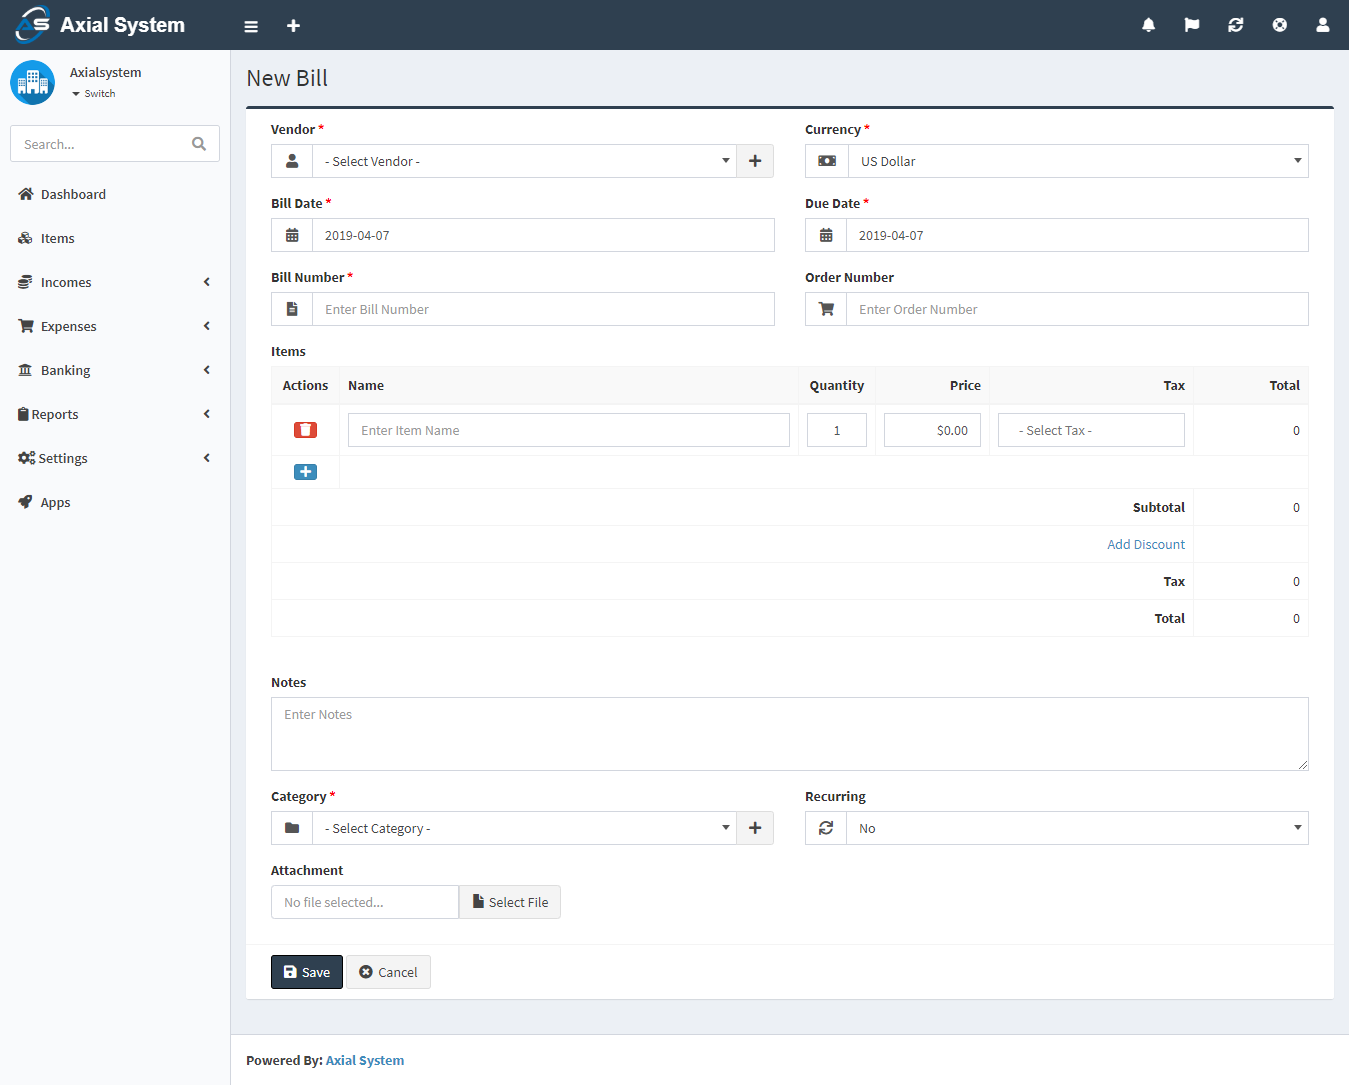
New Bill
The following fields are displayed as blank to be filled, some are required and some not. Those marked with red star are required.
- Vendor: To whom will pay the bill.
- Currency: Currency used.
- Bill Date: Date when the bill is issued.
- Due Date: Date when the bill is due to be paid.
- Bill Number: The number assigned to the bill, by your vendor.
- Order Number: A number assigned to an order for that bill.
- Items: The list of all items that can be assigned to that bill. You can add multiple items.
- Actions: There are 2 (two) actions; Add and Delete.
- Name: The name of item. It will populate records from Items page after you start typing their name. It can also be a custom item.
- Quantity: Default is 1. You can enter decimal quantity (1.7)
- Price: The purchase price of item. It will bring it automatically but you have the opportunity to change it if you want.
- Tax: The list of applicable Tax Rates. You can select multiple taxes. See the Settings > Tax Rates documentation for more details.
- Total: It will calculate automatically the total price of item according the quantity and tax. It is not an editable field.
- Subtotal: The total prices of items without taxes.
- Tax: The total price of taxes.
- Total: The final amount of bill, including everything.
- Notes: You can add a custom note to the bill.
- Category: Category of the bill to be used in reports.
- Recurring: Automatically create bills for ongoing jobs. Times=0 means infinite. Don’t forget to set the Cron Command available at Settings > General > Scheduling.
- Attachment: You can attach file related to the bill.
Show Bill
The following image shows the details page of a bill:
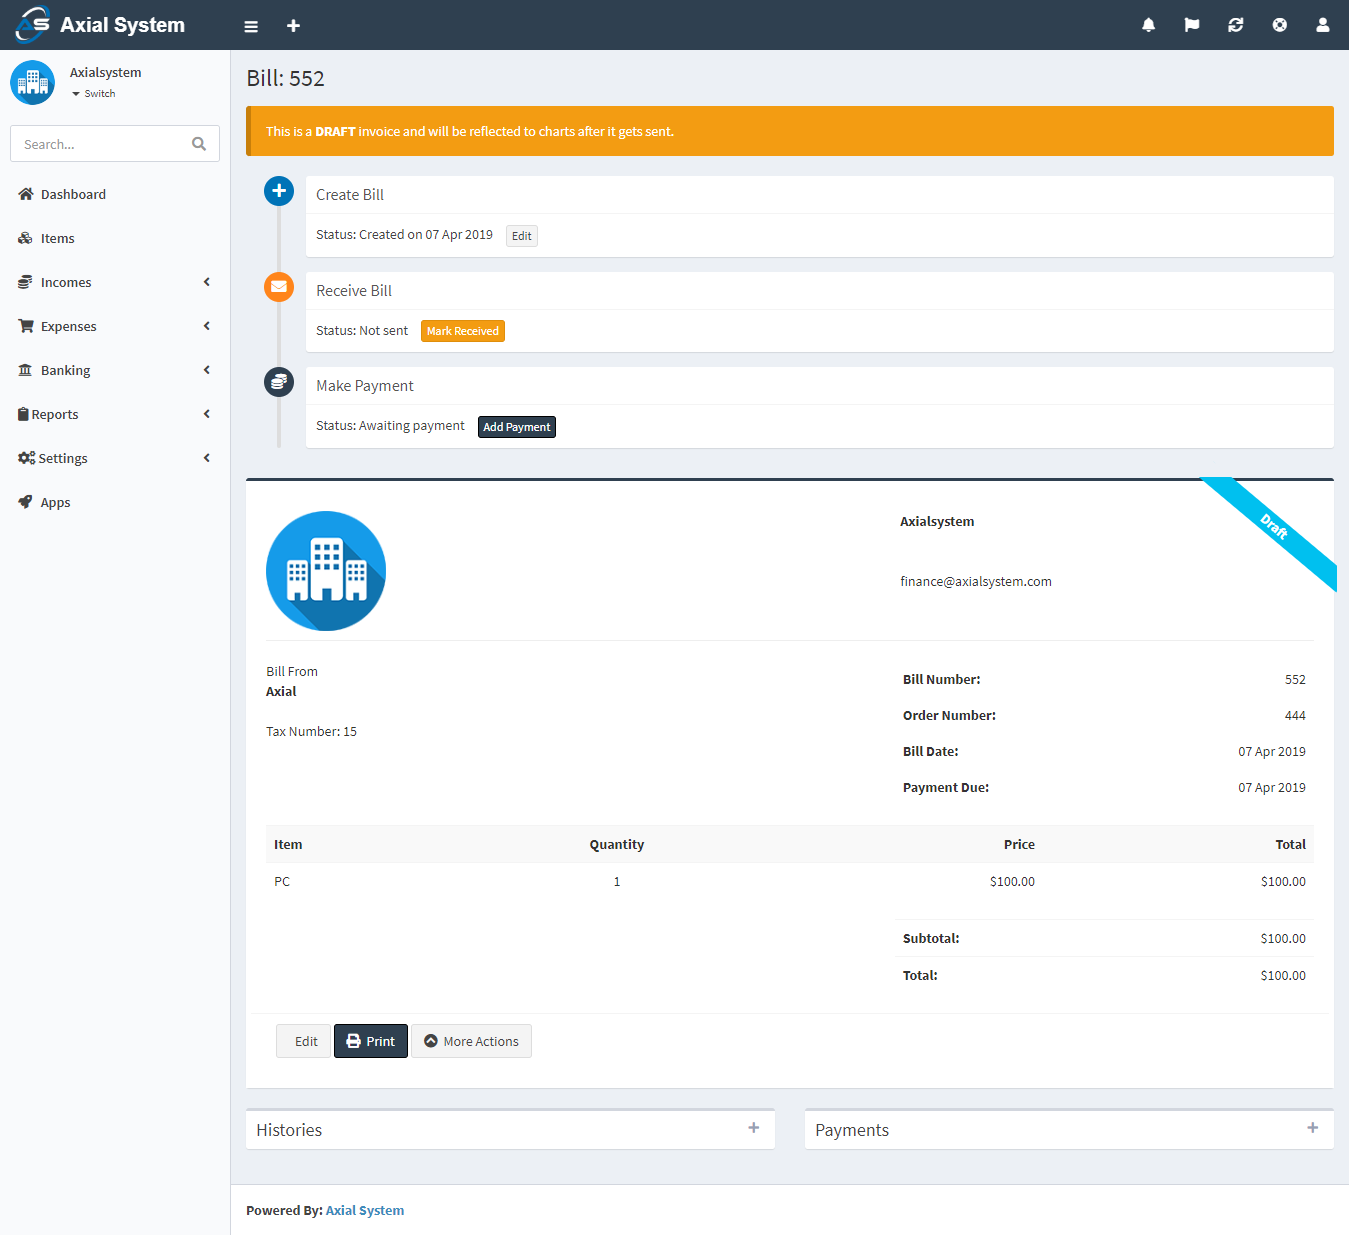
Actions
From the left bottom buttons, you can edit, print, delete, add payment, mark as received and apply a lot more actions.
Payments
Payment is a non-billable and paid expense. Check out this page for the difference between bills and payments.
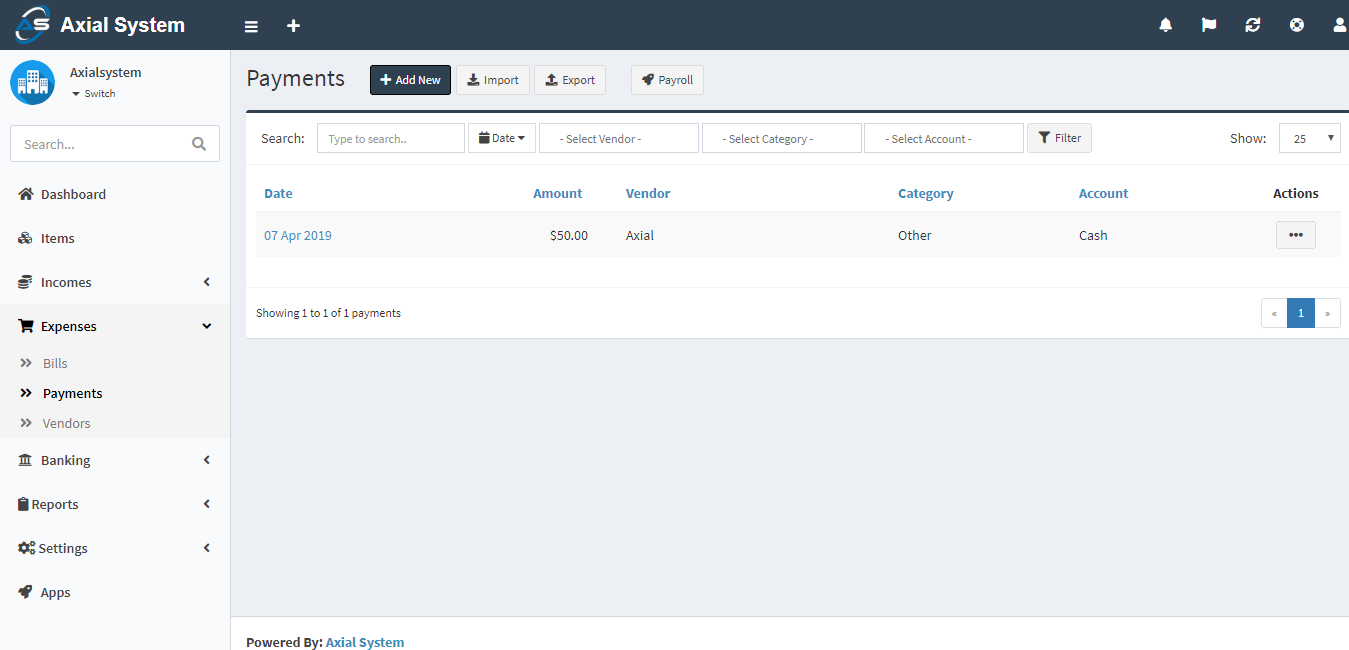
Payments page is located under Expenses > Payments. On this page you can see all payments, search/filter for any, create a new one, edit the current ones and delete them.
The following fields are displayed:
- Date: Paid date.
- Amount: Amount of the payment.
- Vendor: To whom made the payment.
- Category: Category of the payment.
- Account: Account used to pay.
- Actions: You can use this button to edit, duplicate, and delete the payment.
New Payment
The following feilds are displayed as blank to be filled, some are required and some not. Those marked with red star are required.
- Date: Paid date.
- Amount: Amount of the payment.
- Account: Account used to pay.
- Description: Custom description for the payment.
- Category: Category of the payment to be used in reports.
- Recurring: Automatically create payments for ongoing jobs. Times=0 means infinite. Don’t forget to set the Cron Command available at Settings > General > Scheduling.
- Vendor: To whom made the payment.
- Payment Method: Method used to pay.
- Reference: Any possible reference.
- Attachment: You can attach file related to the payment.

Vendors
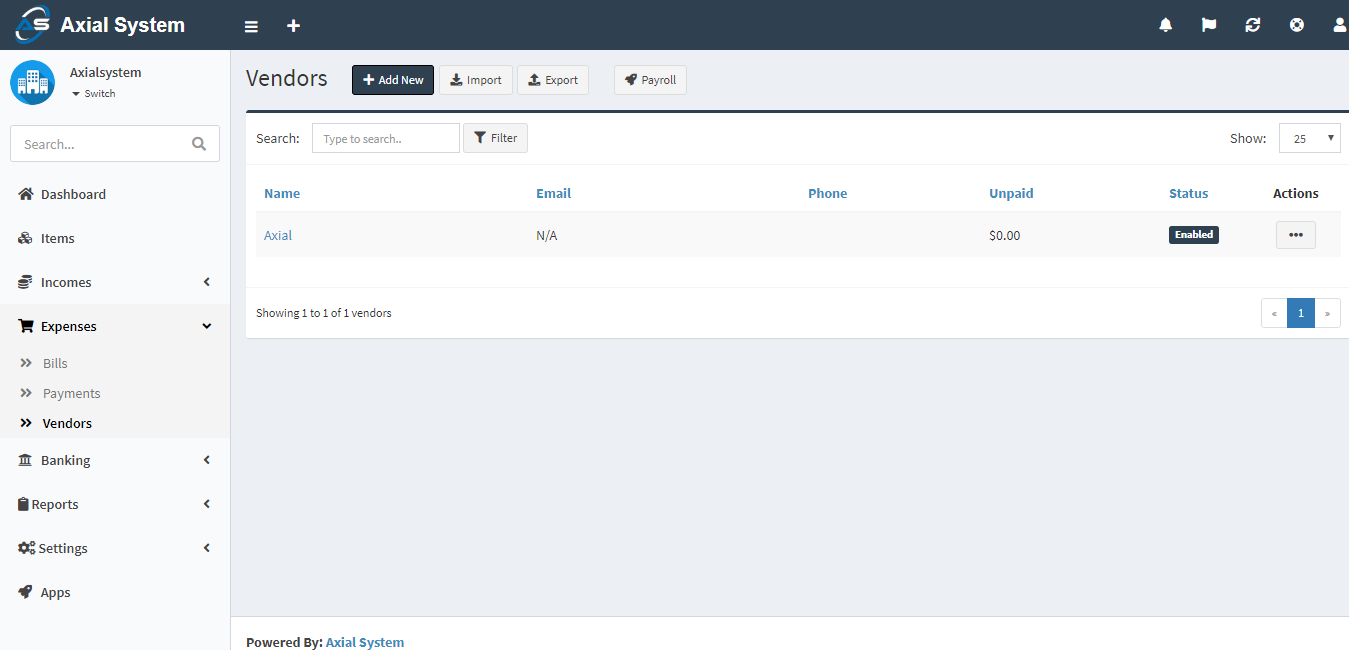
Vendors section is located under Expenses > Vendors. On this page you can see all vendors, search for any, create a new one, edit the current ones and delete them.
The following details are displayed:
- Name: Vendor’s name.
- Email: Vendor’s email adress.
- Phone: Vendor’s phone number.
- Unpaid: The amount that vendor is waiting to be paid for.
- Status: Status of the vendor.
- Actions: You can use this button to edit, duplicate, and delete the vendor.
New Vendor
The following fields are displayed as blank to be filled, some are required and some not. Those marked with red star are required.
- Name: Vendor’s full name.
- Email: Vendor’s email adress.
- Phone: Vendor’s phone number.
- Website: Vendor’s website.
- Address: Vendor’s address
- Currency: Default currency to be used for the vendor
- Enabled: Status of the vendor.
- Reference: Any possible reference.
